
Tuesday, December 29, 2015
Make your own pocket tissue pouch
We all have those frugal pet peeves. The things that even though they may be cheap... we know that they are way overpriced and it bugs us. One of the things that bugs me are the pocket or purse size tissues. I can get three name brand packets for only $1 at the dollar store which seems cheap until you realize that there are only 10 tissues per pack. So you are paying $1 for 30 tissues or 3.3 cents each. I can get three big boxes of the same name brand at Target for $5.99 for 480 tissues or 1.2 cents each. That is a considerable markup for a flimsy, single use plastic pouch. But if you have kids or work with kids those packets are super useful when you see a runny nose. So here is my easy, basically free solution. First get 10-15 tissues. Fold each one longways then do a trifold like a wallet. They need to be folded individually. If you try to do the whole stack you won't be able to pull them out of the pouch without ripping. Make a neatish stack. Next take some pretty and lightweight scrap fabric. Cut out a rectangle that will wrap around your little pile of tissues. Make a hem on either end. Next, wrong sides together, you want to wrap around your pile so the hemmed ends overlap a bit. Pin both hemmed ends together. Sew both non-hemmed ends with a zigzag stitch. Turn inside out and insert your pile of tissues. Took me maybe 2 minutes to fold the tissues and a half hour to sew 2 pouches. Could also be cute in a get well basket! Much prettier than the plastic pouches and one third the price!

Sunday, December 27, 2015
Homemade thread spool and bobbin holder
This one is easy and so useful! My thread was always a huge messy pile that you'd have to dig through to find the color you wanted and my bobbins were even worse. I decided to get more organized. I bought a few thin dowel rods and carefully cut them to about 5 inch lengths. I took some leftover pieces from my bamboo flooring and drilled small holes to stick the dowels in. You want to be sure to leave a whole diameter of thread between each one plus enough room for you to reach down. I stuck a little wood glue in each whole then the dowels. Wait for it to dry and then organize by color. So much easier you'll be wishing you'd done it years ago!


Homemade kitchen compost bucket
I have an outdoor kitchen compost bin. Of course squirrels immediately chewed through one of the lower vents and my backyard chickens peruse it from this new convenient entryway. It kind of looks like a giant darth vader helmet in my backyard but it is still great because I cook 90% of my own meals and therefore have a lot of vegetable trimmings and eggshells. Composting them cuts way down on my weekly amount of garbage and allows material that easily decomposes to do so instead of being enshrined in a landfill. My only problem was what to collect these kitchen scraps in? I certainly wasn't going to pay $40 or more dollars for the fancy ones they sell with charcoal filters for smell. I go out to the backyard at least twice a day to tend the chickens so kitchen scraps wouldn't be sitting around long. Originally I tried a dish on the counter but that took up precious countertop space in my small kitchen and usually quickly overflowed. I wanted a larger container that was out of the way but easy to grab and dump when I'd go outside. Solution! I took a gallon milk jug and cut away the part opposite the handle. This retains the easy to grab handle but provides a large space for kitchen scraps. Unlike a small bucket with a mobile handle, I can easily dump this with one hand and the handle stays free of overspill. It is also very easy to clean. I keep it on the top step leading to the backdoor. This way it is out of the way but easy to remember to grab. The large mouth also makes it easy to toss a handful of scraps in without having to bend over. It works perfectly! Another hint. Sometimes the outdoor kitchen compost can get stinky in hot weather. I just sprinkle some fireplace ashes that I accumulate all winter (mainly for use in keeping the chicken coop fresh smelling) over the top of the compost. Works like a charm!


Tuesday, December 22, 2015
picture frame jewelry display
I wear earrings pretty much everyday. I used to store them in a jewelry box but found I would always just pick from the ones I hadn't put back because it was too much of a hassle to dig out another pair. I also found that some earrings I loved never got worn because I forgot about them, buried under others. My solution was to use a cheap wooden picture frame from the Goodwill. I screwed in some small screws on either side on the front and strung ribbon across. This allows me to display all my earrings. It was super easy and I use it every single day!


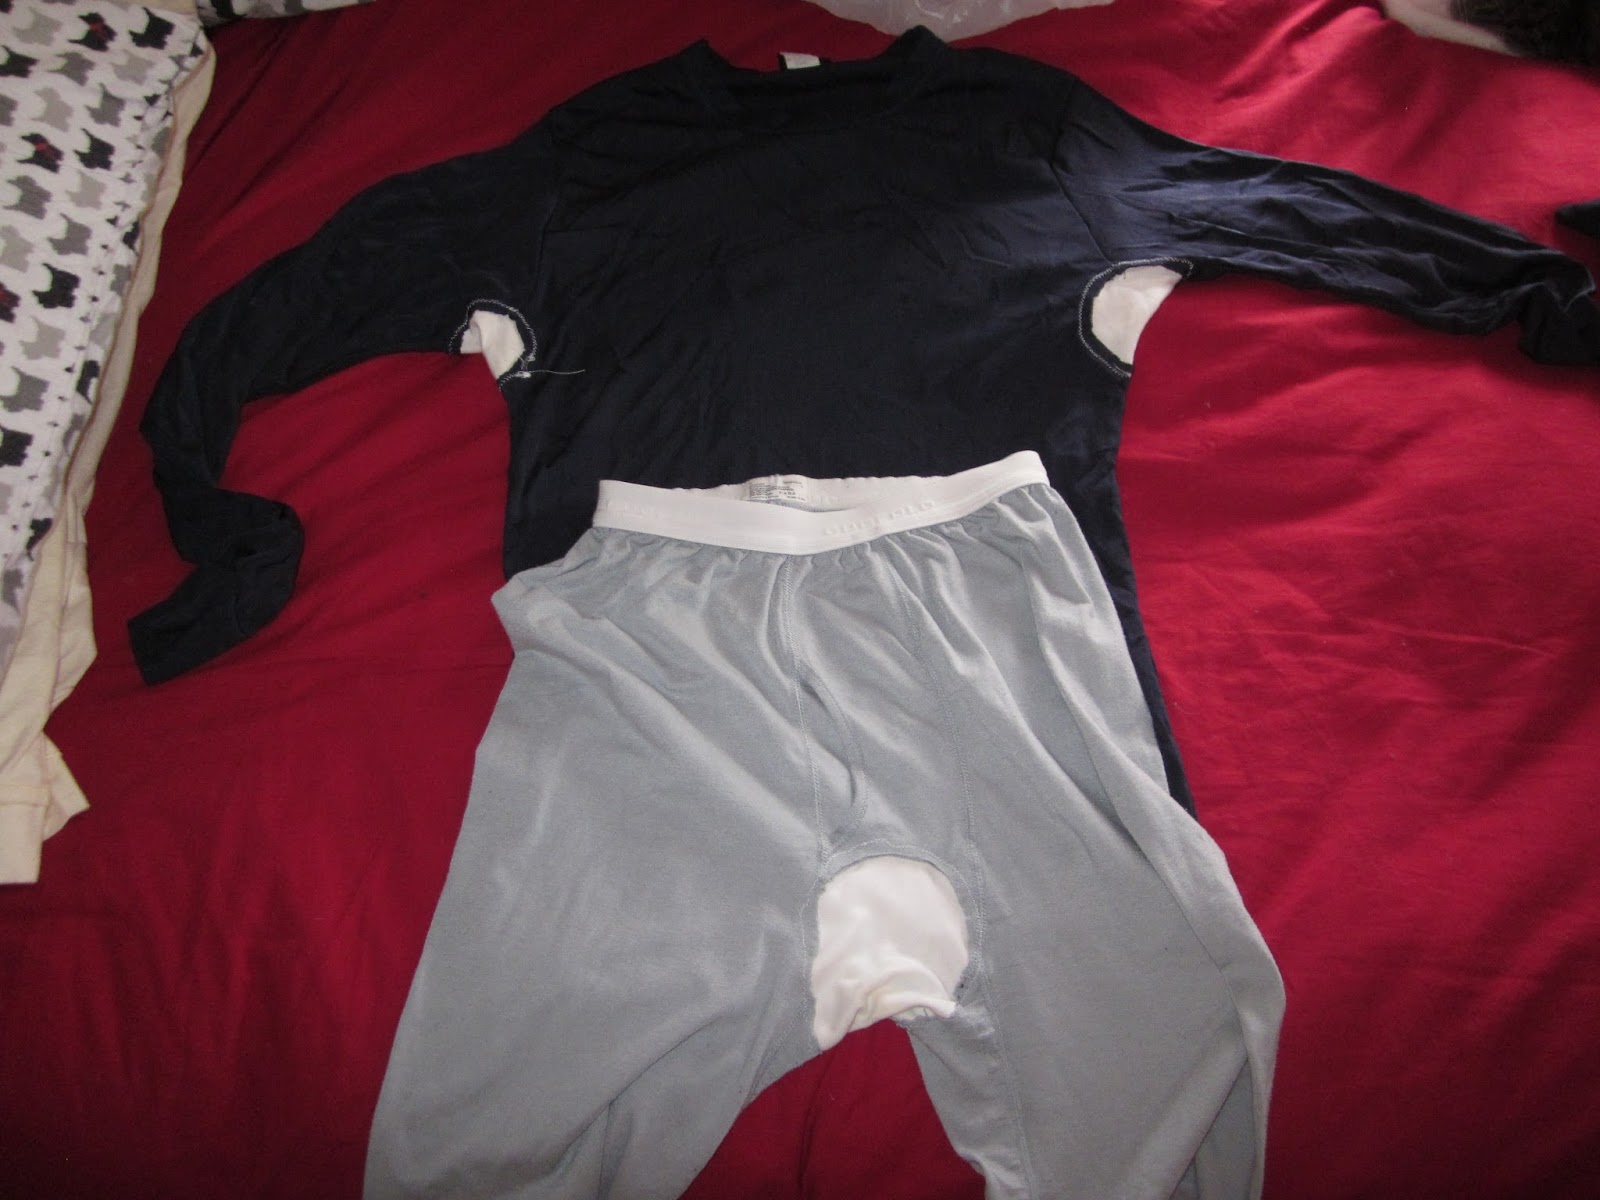
life hack for breathable long underwear
In these winter months long underwear can be a huge help, especially when spending time outside. The old long underwear were warm and breathable cotton but bulky. The new type is warmer, lighter and thinner but 100% synthetic fabric which means it doesn't breath. This can lead to discomfort as moisture builds up especially if you are exerting yourself and sweating. SO! Here is a hack for that. Simply take an old shirt or whatever made from stretchy cotton and cut out some circles. Cut out some slightly smaller holes in the armpits and crotch of your long underwear. Using a zig zag stitch on your machine or by hand sew the circles of stretchy cotton in. You will find the long underwear much more comfortable yet equally warm. Doesn't do a thing for the lack of sexiness factor but much more practical :)

Thursday, December 10, 2015
Holiday decorating! My holiday decorating is minimal but festive and reusable from year to year. I skip any tree. Buying a live tree is expensive and kills a tree and buying artificial is introducing more plastic into your home. I simply lay some lcd lights on my mantle each year which brightens the living room on these long winter evenings.

Then yesterday I make a wreath I LOVE from random green items I got at the Habitat store and our recycled craft store. The items I picked were zippers, crayons, army men, a tie, mardi gras beads, wooden blocks, marbles, puzzle pieces, plastic clothespins, plastic fruit, bottle caps and cookie cutters. I bought a cheap twig wreath that had very fake leaves for $1 from the Habitat store and using wire cutters removed the fake foliage.

This would be a wonderful craft to do with kids. It took a little over an hour w/ my hot glue gun. Best of all it is 100% reused materials.


I am also making homemade holiday cards again. Here is my design this year. Each card takes about 15 minutes and again, all materials I got from the recycled craft store! For the cards I use a carpet needle which gives a bigger hole and is curved so it doesn't poke your finger with each thrust. I work on a folded cloth napkin on top of an old book. Work from the backside. Mine are all freehand but you can find a million templates for snowflakes if you google "snowflake template". Happy holidays

Then yesterday I make a wreath I LOVE from random green items I got at the Habitat store and our recycled craft store. The items I picked were zippers, crayons, army men, a tie, mardi gras beads, wooden blocks, marbles, puzzle pieces, plastic clothespins, plastic fruit, bottle caps and cookie cutters. I bought a cheap twig wreath that had very fake leaves for $1 from the Habitat store and using wire cutters removed the fake foliage.


I am also making homemade holiday cards again. Here is my design this year. Each card takes about 15 minutes and again, all materials I got from the recycled craft store! For the cards I use a carpet needle which gives a bigger hole and is curved so it doesn't poke your finger with each thrust. I work on a folded cloth napkin on top of an old book. Work from the backside. Mine are all freehand but you can find a million templates for snowflakes if you google "snowflake template". Happy holidays
Friday, September 11, 2015
cat bookmark craft
Here are some cute cat bookmarks for the feline loving reader in your life. I glued a small piece of paper to the back of the white one in order to reinforce the ribbon. The little legs on the yellow one are cut out so they go over the side of the page you are marking. Easy to make and cute homemade gifts!


Friday, August 14, 2015
Superhero Party
Here are some frugal ideas for a kids' super hero party. Lots of FUN!
Barbell made from old mop, broom or rake handle and empty paint cans with holes drilled in lid for dowel. Take an old blue sheet or blue fabric, draw city skyline with sharpie, cut out some clouds with white fabric and glue on. Kids can lay with arms and legs out like they are flying over the city for fun pictures. Take some scrap 2x4 chunks of wood a foot or so long. Draw squares on the side with sharpies for windows. Have kids see how many stories of the building they can jump over. Take some thick styrofoam and draw brick pattern with sharpie. Stack these for the kids to kick or punch over. These last two were ESPECIALLY popular (instead of styrofoam you could used shoe boxes - less messy). Snack was Captain America's shield made with circle of sliced strawberries, circle of sliced bananas and blueberries in center with a foil covered star in the middle. Serve in a little cup and no need for silverware. Healthy, simple and cute. Also had option of super hero cubecraft printed on cardstock. Have fun!!

Barbell made from old mop, broom or rake handle and empty paint cans with holes drilled in lid for dowel. Take an old blue sheet or blue fabric, draw city skyline with sharpie, cut out some clouds with white fabric and glue on. Kids can lay with arms and legs out like they are flying over the city for fun pictures. Take some scrap 2x4 chunks of wood a foot or so long. Draw squares on the side with sharpies for windows. Have kids see how many stories of the building they can jump over. Take some thick styrofoam and draw brick pattern with sharpie. Stack these for the kids to kick or punch over. These last two were ESPECIALLY popular (instead of styrofoam you could used shoe boxes - less messy). Snack was Captain America's shield made with circle of sliced strawberries, circle of sliced bananas and blueberries in center with a foil covered star in the middle. Serve in a little cup and no need for silverware. Healthy, simple and cute. Also had option of super hero cubecraft printed on cardstock. Have fun!!

Friday, August 7, 2015
homemade cards from paint sample booklets
You can create adorable and heartfelt homemade cards out of just about any reused or repurposed paper product. One item to explore is those think booklets of paint samples. Here are a few cards that my niece and I made using them. People love to get homemade cards! They are WAY cheaper than hallmark. And a way to get creative. See what you come up with (or use pinterest and see what everyone else came up with).


Subscribe to:
Comments (Atom)